there are essentially two ways to program a microcontroller like this.
one is to use an arduino as a programmer, and as a bootloader, and the other is to install the bootloader on the attiny itself (although that takes up a little bit of its memory).
followed this: https://www.youtube.com/watch?v=Q5x0SWKeQ8o
attiny84 pinout:
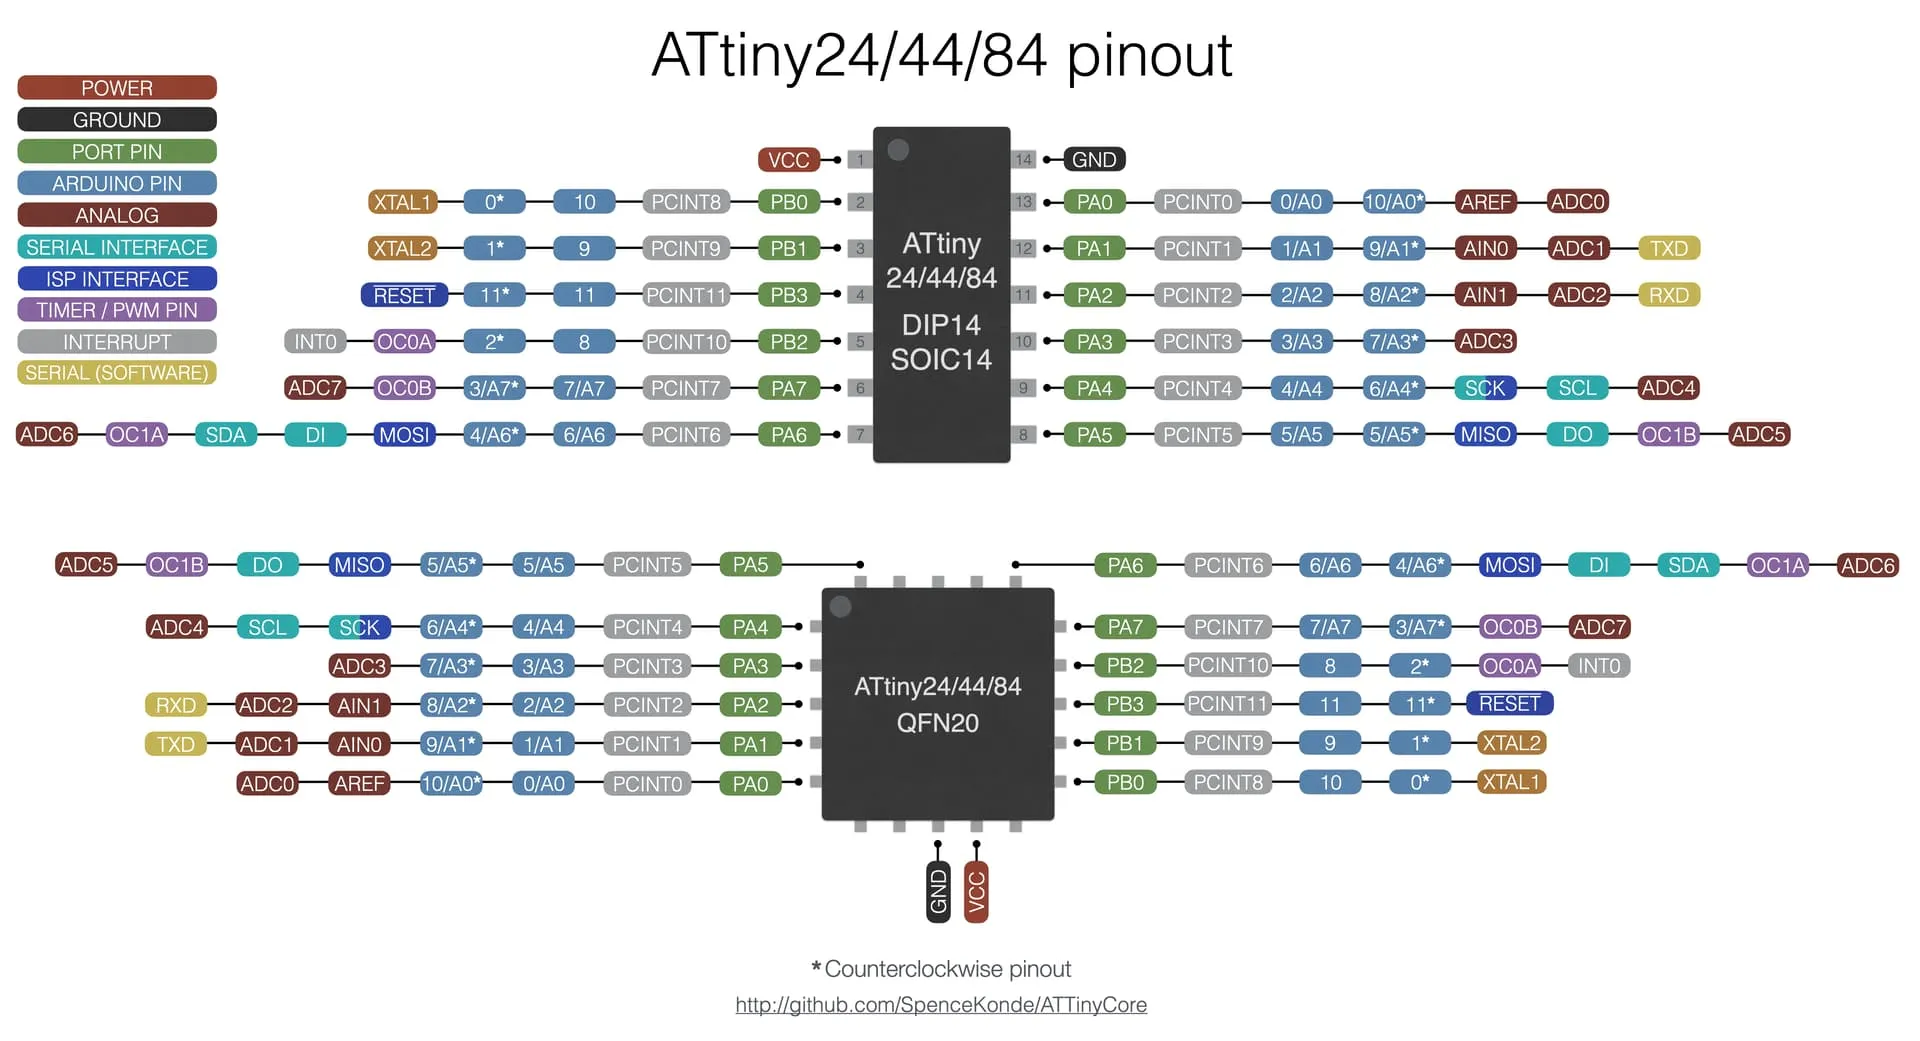
when programming, you want to use the pin-numbers in blue, and not the physical numbers.
method 1: using arduino as isp programmer
we use an arduino-uno as a programmer, meaning that we burn a bootloader onto the arduino with these settings:
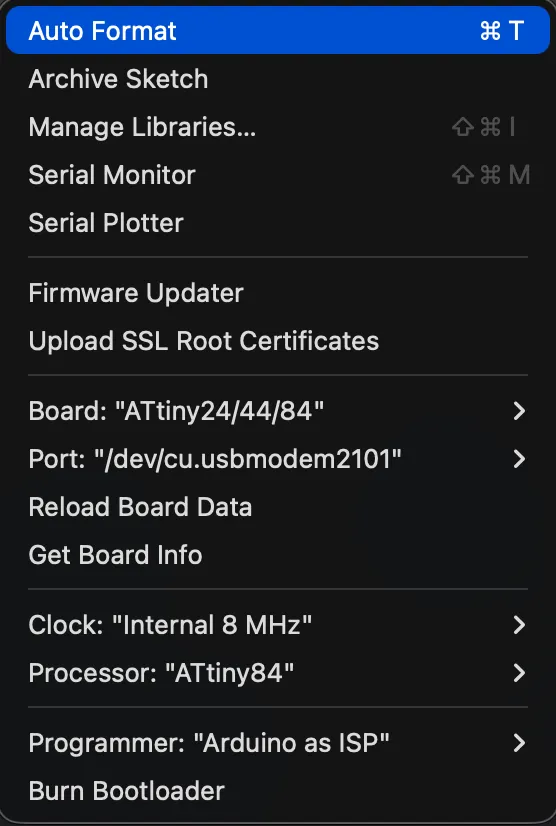
the isp sketch can be found on the arduinoisp library > examples. you will have to install an external board manager, using a link; which can be found here: https://raw.githubusercontent.com/damellis/attiny/ide-1.6.x-boards-manager/package_damellis_attiny_index.json
the wiring looks like so (l uno; r attiny (physical pin numbers (1-4))):
- pin 10 → pin 4.
- pin 11 → pin 7.
- pin 12 → pin 8.
- pin 13 → pin 9.
- reset → + 10uf capacitor → - to gnd. this prevents the firmware from installing onto the arduino itself.
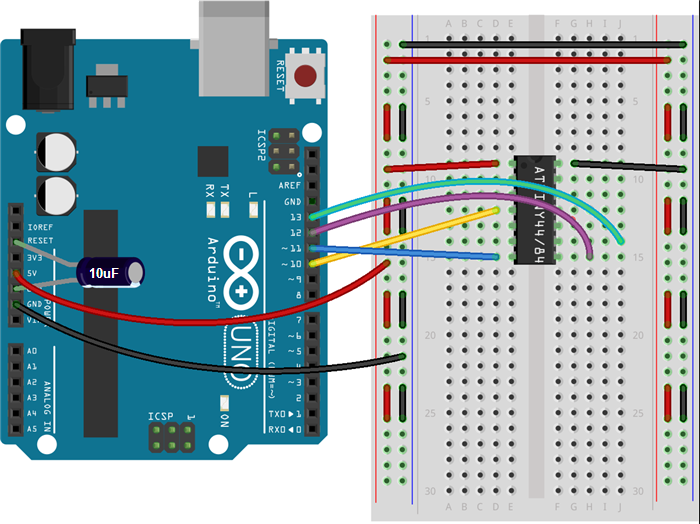
the attiny84 as an internal 8mhz timing crystal on it; so no need for an external clock.
method 2: installing bootloader.
this seems a little complicated for me now; but the tutorial is here: https://learn.sparkfun.com/tutorials/how-to-install-an-attiny-bootloader-with-virtual-usb/all